Microscopic Exploration of the Future Library Management System – 00005
面向未来图书管理系统的微观探索 – 00005
In this article, we will try to create a simple e-book library, and here is the plan:
- Define the Book class with properties like title, author, publication year, and file path.
- Create a Library class that will hold and manage the collection of books.
- The Library class should have methods to add a book, remove a book, search for a book, and list all books.
- Implement a user interface (could be command-line for simplicity) that allows the user to interact with the library.
And if we want to show it on the website, we can use JavaScript along with HTML and CSS to create a simple e-book library.
We need two files: an HTML file (for example, index.html) and a JavaScript file (for example, library.js). Here is the code:
index.html:
<!DOCTYPE html>
<html>
<head>
    <title>E-Book Library</title>
    <style>
        .book {
            margin: 10px;
            padding: 10px;
            border: 1px solid #000;
        }
    </style>
</head>
<body>
    <h1>E-Book Library</h1>
    <div id="book-list"></div>

    <h2>Add a Book</h2>
    <form id="book-form">
        <label for="title">Title:</label><br>
        <input type="text" id="title" name="title"><br>
        <label for="author">Author:</label><br>
        <input type="text" id="author" name="author"><br>
        <label for="year">Year:</label><br>
        <input type="text" id="year" name="year"><br>
        <label for="filePath">File Path:</label><br>
        <input type="text" id="filePath" name="filePath"><br>
        <input type="submit" value="Add Book">
    </form>

    <script src="library.js"></script>
</body>
</html>
library.js:
let books = [];

document.getElementById('book-form').addEventListener('submit', function(event) {
    event.preventDefault();

    const title = document.getElementById('title').value;
    const author = document.getElementById('author').value;
    const year = document.getElementById('year').value;
    const filePath = document.getElementById('filePath').value;

    const book = { title, author, year, filePath };
    books.push(book);

    document.getElementById('title').value = '';
    document.getElementById('author').value = '';
    document.getElementById('year').value = '';
    document.getElementById('filePath').value = '';

    displayBooks();
});

function displayBooks() {
    const bookList = document.getElementById('book-list');
    bookList.innerHTML = '';

    books.forEach((book, index) => {
        const bookDiv = document.createElement('div');
        bookDiv.classList.add('book');
        bookDiv.innerHTML = `
            <h3>${book.title}</h3>
            <p>${book.author}</p>
            <p>${book.year}</p>
            <p>${book.filePath}</p>
            <button onclick="removeBook(${index})">Remove</button>
        `;
        bookList.appendChild(bookDiv);
    });
}

function removeBook(index) {
    books.splice(index, 1);
    displayBooks();
}
The HTML file contains the structure and content of your webpage, while the JavaScript file contains the logic for adding, displaying, and removing books.
The line <script src="library.js"></script> in the HTML file is used to link the JavaScript file to the HTML file. This line should be placed at the end of the body section to ensure that the HTML elements are loaded before the JavaScript file tries to access and manipulate them.
If you want to keep everything in one file, you could include the JavaScript directly in the HTML file inside <script> tags. However, separating HTML and JavaScript into different files is a common practice as it makes the code more organized and easier to maintain.
Next step, we need to run the HTML and JavaScript code, follow these steps:
- Save the HTML code in a file with a
.htmlextension, for example,index.html. - Save the JavaScript code in a file with a
.jsextension, for example,library.js. Make sure this file is in the same directory as your HTML file. - Open the HTML file in a web browser. You can do this by double-clicking the file, or by right-clicking the file and selecting ‘Open with’ and then choosing your preferred web browser.
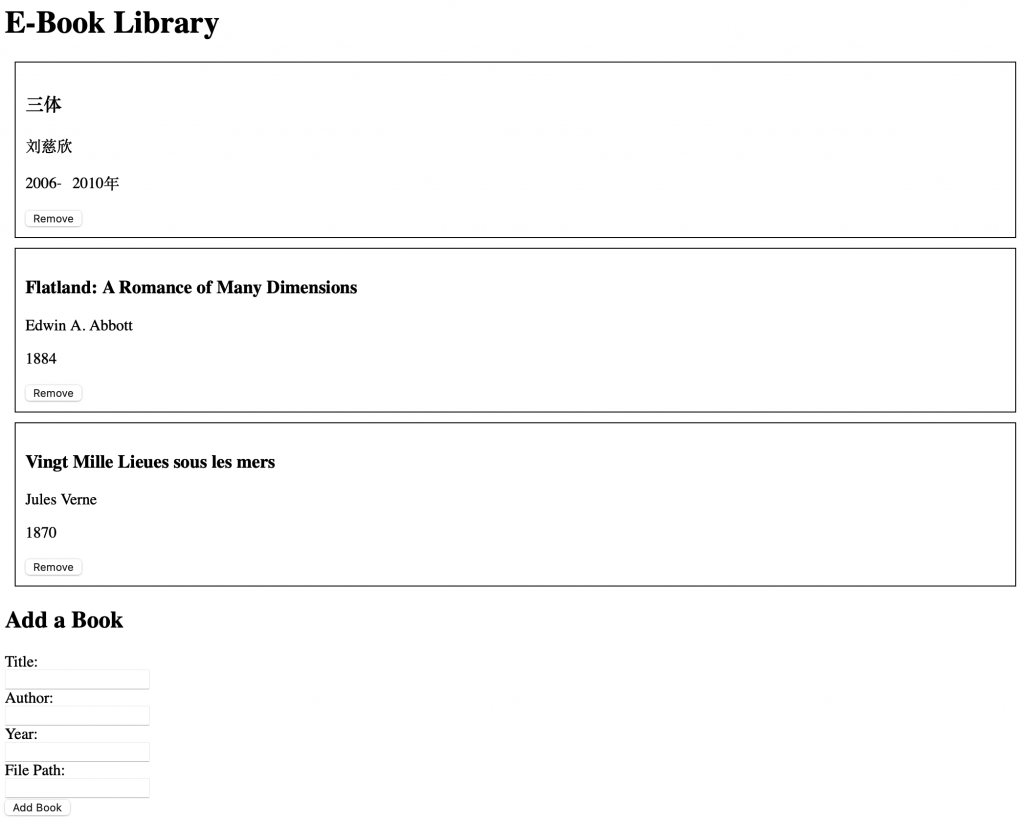
Here is the screenshot of the final result:

The web page should now be displayed in your browser, and the JavaScript code will be executed when you interact with the page, for example, when you fill out the form and click the ‘Add Book’ button. In the picture, we added 3 books, and you can add more.
Please note that this is a simple client-side application. It doesn’t involve any server-side code or database, so the data you enter will not persist if you refresh or close the page.
See you in the next exploration.